Please email [email protected] if you have any questions.
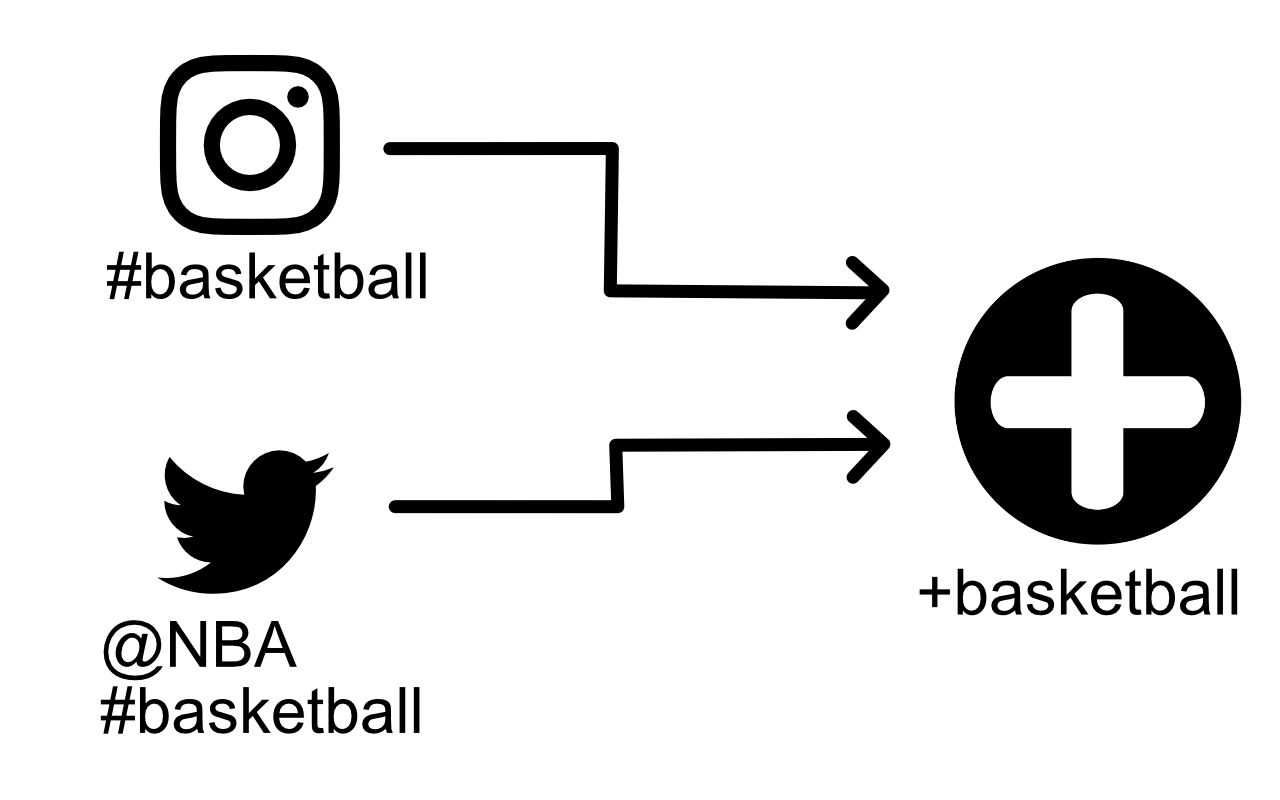
Taeggie combines multiple social media sources (user accounts, hashtags) into a single feed.
You can deploy Taeggie in three different ways: regular install, iframe install or direct API use.
This is the recommended install method.
You need to have jQuery 1.4.4 or newer in order to make this code work.
Copy the following code to your webpage, replacing YOUR_TAEGGIES_NAME with the name of your own taeggie.
Taeggie is rendered to wherever you place the code on your web page. This way you can freely place the feed.
This install method isolates Taeggie to an iframe, which means it executes in a different namespace from rest of the page. A drawback of this method is that taeggie cannot reshape dynamically, as its size is determined by the iframe.
Copy the following code to your webpage, replacing YOUR_TAEGGIES_NAME with the name of your own taeggie.
In this version jQuery is included, so you do not have to worry about what version you have, or if you have it at all.
If you want to install Taeggie on a Wordpress site, you can use your plugin. Click here for Wordpress plugin instructions.
To use the API directly, contact us by email and we will help you get started.
Taeggie can be customized by modifying settings and by adding CSS code.
In the taeggie management view, the easisest way to customize the taeggie is to select one of the available themes.
Additionally, you can set other configuration options such as colours.
More powerful modifications can be made by adding CSS rules. You can either add them to your website or enter them in taeggie settings.
Determine yout Taeggie element ID and use that to style various elements inside your taeggie.
All html elements of taeggie can be customized by adding CSS rules. Use the following list as a reference. Use the Web Inspector to fully review the HTML structure of taeggie.
| CSS-class | description |
|---|---|
| author-image | Profile image of the user who posted this post. |
| author | Username of the user who posted this post. |
| header | Alue jossa Taeggien nimi (vain scroller-teemassa) |
| image | Postauksen kuva. |
| post | Individual post. |
| posted-at | The time when this content was posted. |
| posts | Area containing the posts. Set height for this element to control the height of taeggie |
| screen-name | Screen name of the poster |
| social-network | Logo of the social network. |
| text | Text content of the post (if there is any) |
Make sure you prepend the CSS classes with the ID of the taeggie. This way you can make sure the rules override the default CSS of taeggie. See this example:
And here is the result:
First thing you should do is compare the taeggie on your website to one on the public page that with address https://taeggie.com/t/NAME Replace name
If problem is repeated on both pages, it is probably something related to Taeggie itself. Otherwise the case can be more complicated.
If you can send us an URL where we can view the problematic page, we are glad to check if we can determine what is the problem.
Web inspector can be used to see if the error log contains something useful - it often does.
Email us and we will help you!